22. Export
22.1 Single run export
After importing a ClipGT, you can export runs from the Single Run Debugger at any stage of the workflow. You can export immediately after import, which produces a denoised version of the clip, or after making modifications, running the simulation, and reviewing the results.
-
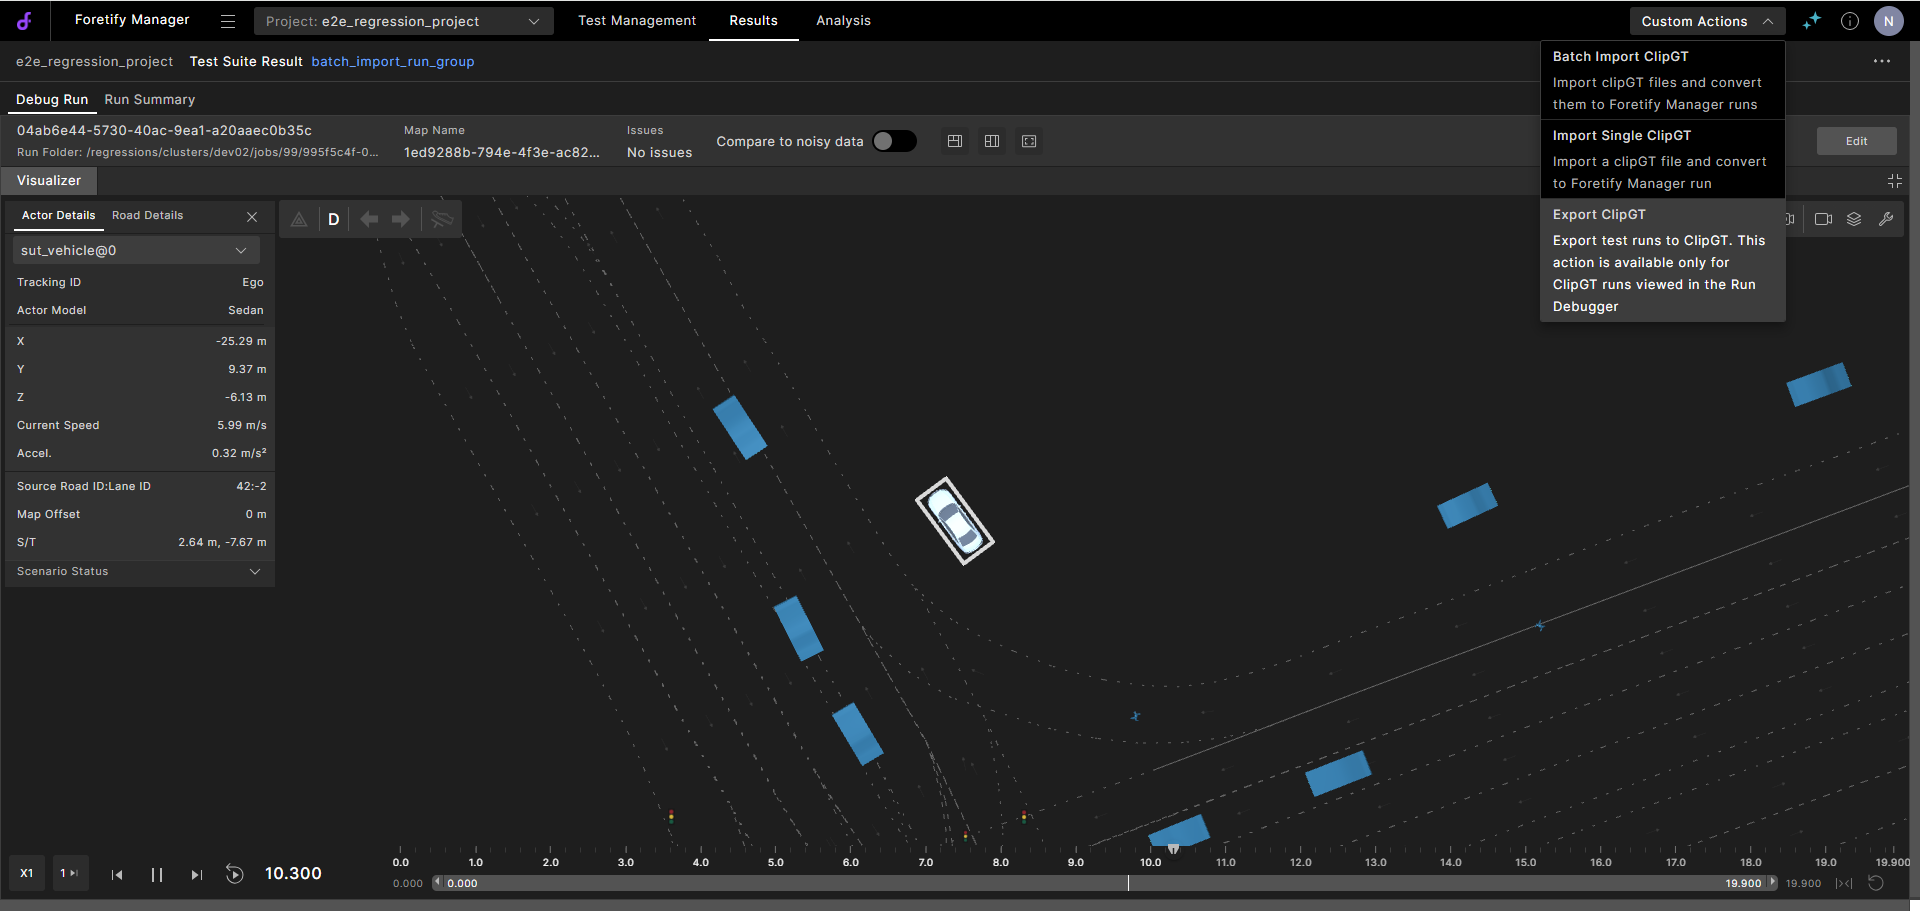
In the toolbar, click Custom Actions and select Export ClipGT.
-
The Export ClipGT dialog opens, showing that one selected run will be exported to ClipGT, and offers two storage options.
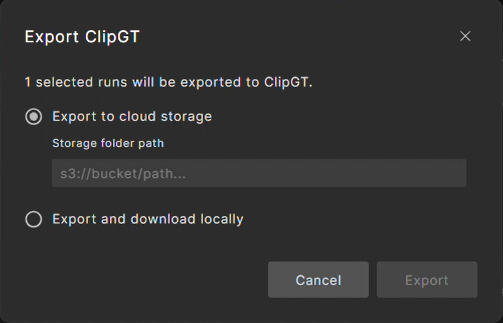
- Select to Export to cloud storage, and enter an S3 bucket location.
- Select to Export and download locally.
-
Click Export to start.
The export process begins, and the status displays.
-
When the export has completed, do one of the following:

-
Click the Download Exported ClipGT
 icon to download the exported ClipGT file.
 -
Click the Go to Flow Executions
 icon to open the Flow Execution page.
-
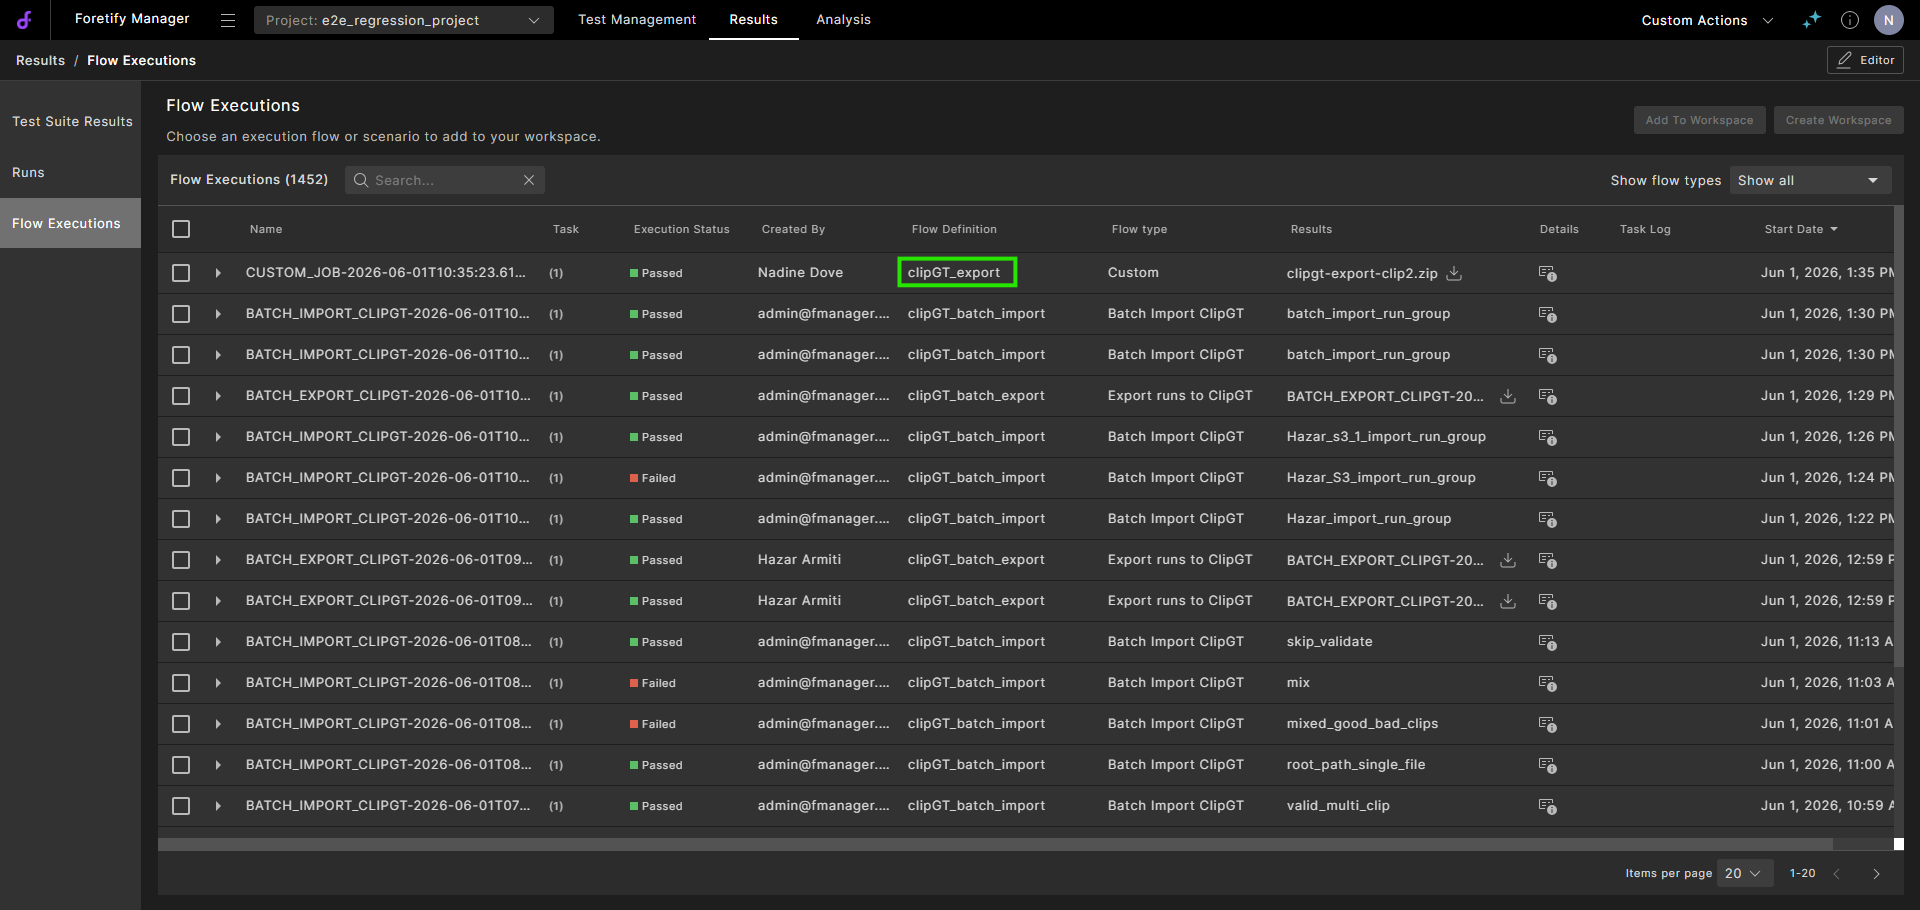
Single-run ClipGT export files have clipGT_export in the Flow Definition column.
-
Click the Details
 icon to view the flow execution details.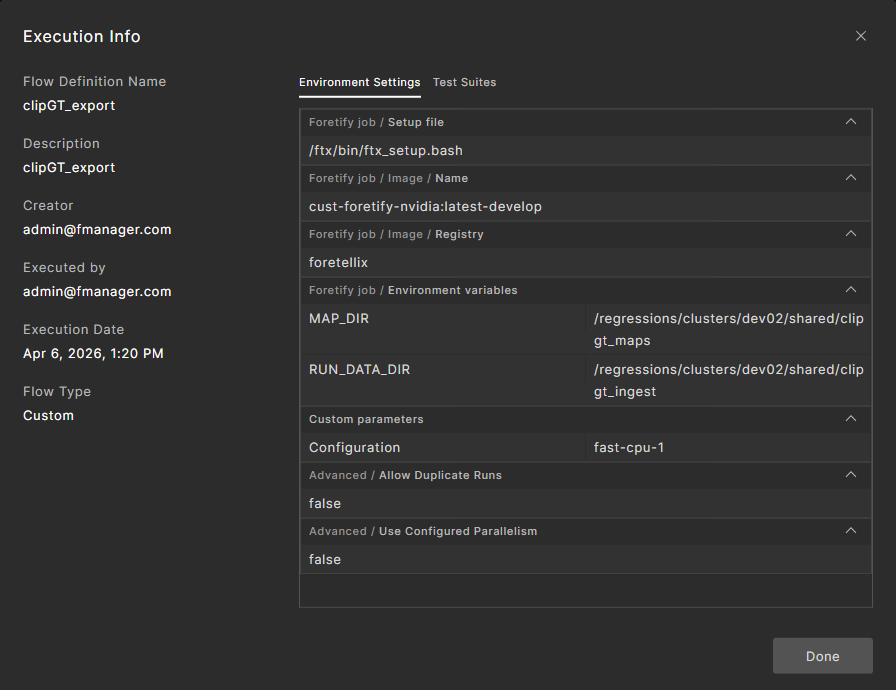
Click Done to close the dialog.
-
Expand the flow execution entry.
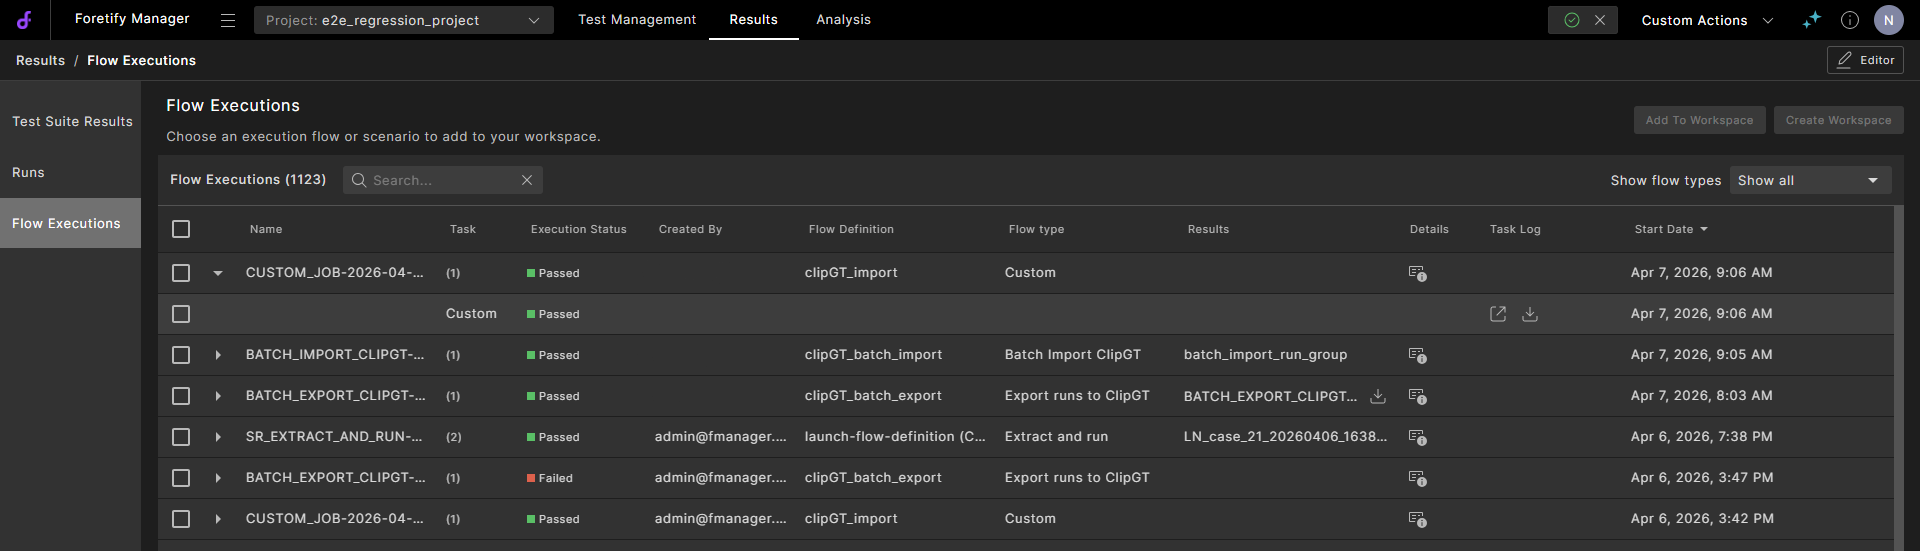
In the Task log column:
- Click the Open task log
 icon to view the log file.
 - Click the Download task log
 icon to download the log to your local machine.
- Click the Open task log
-
-
22.2 Batch export
Batch export lets you export multiple ClipGT runs at once. The system processes each run and packages the results into a single ZIP file for download.
Note
Only runs with an original ClipGT file are eligible for batch export.
-
Select the runs to export:
-
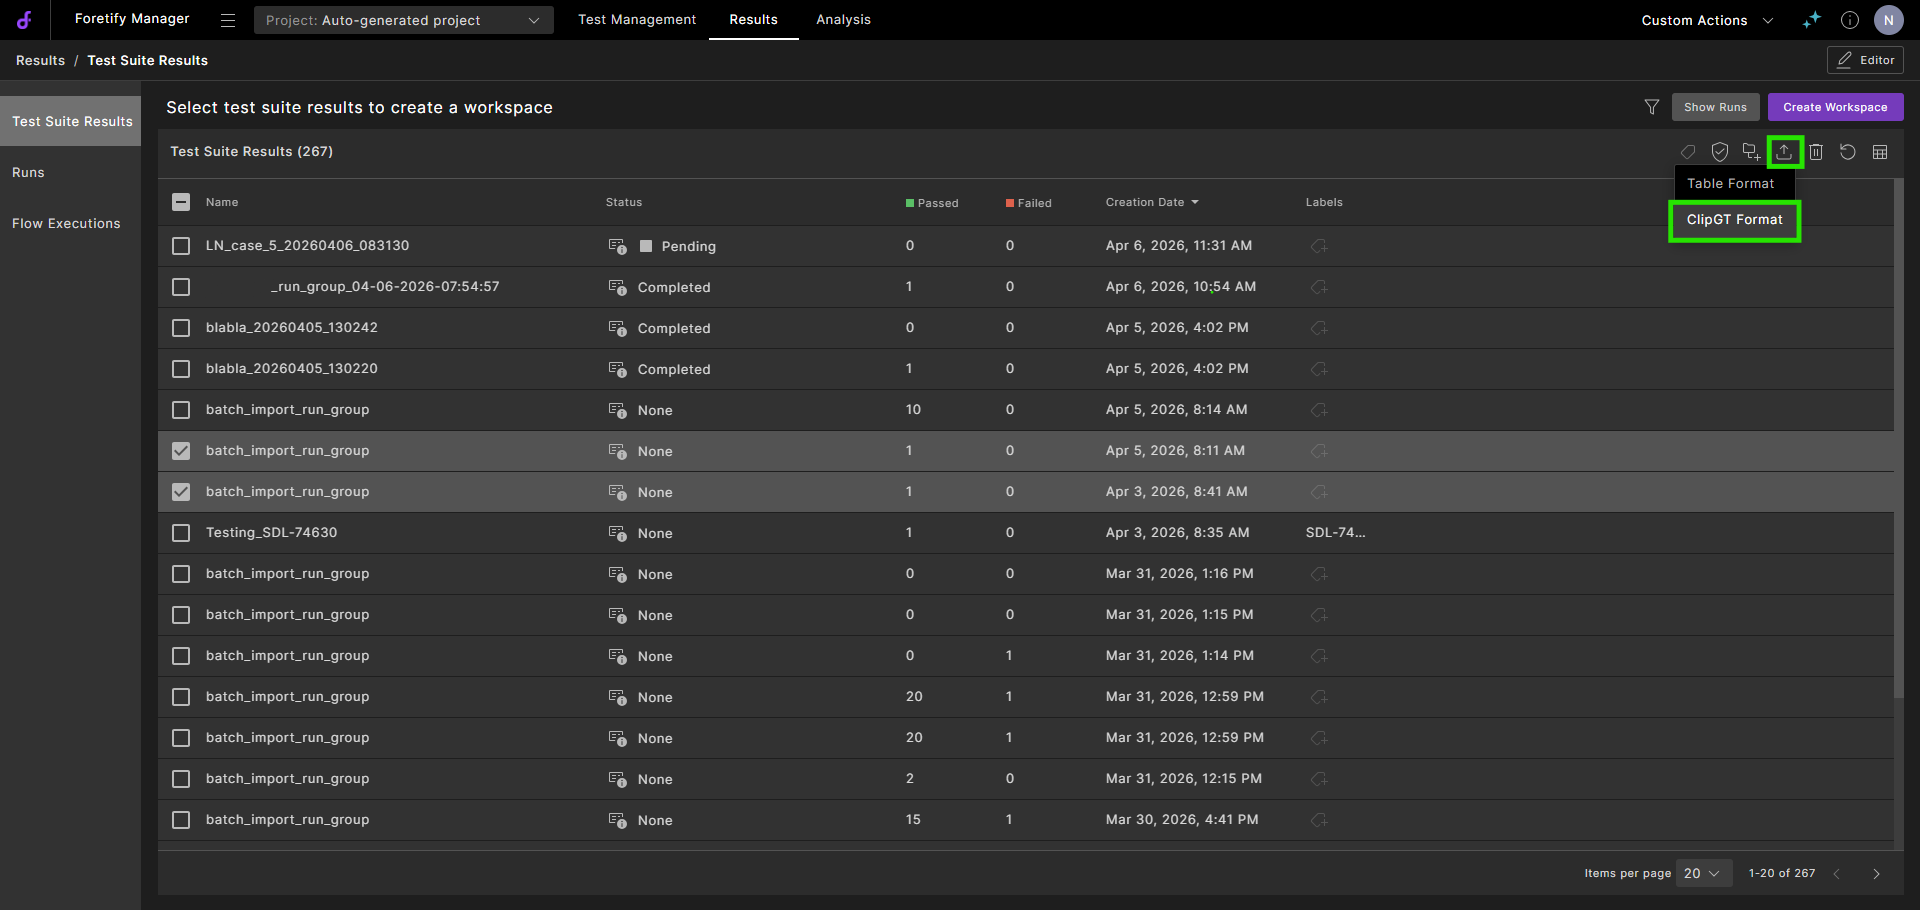
Outside a workspace, select the Results tab and then Test Suite Results, and select the checkboxes of test suite results to export.
-
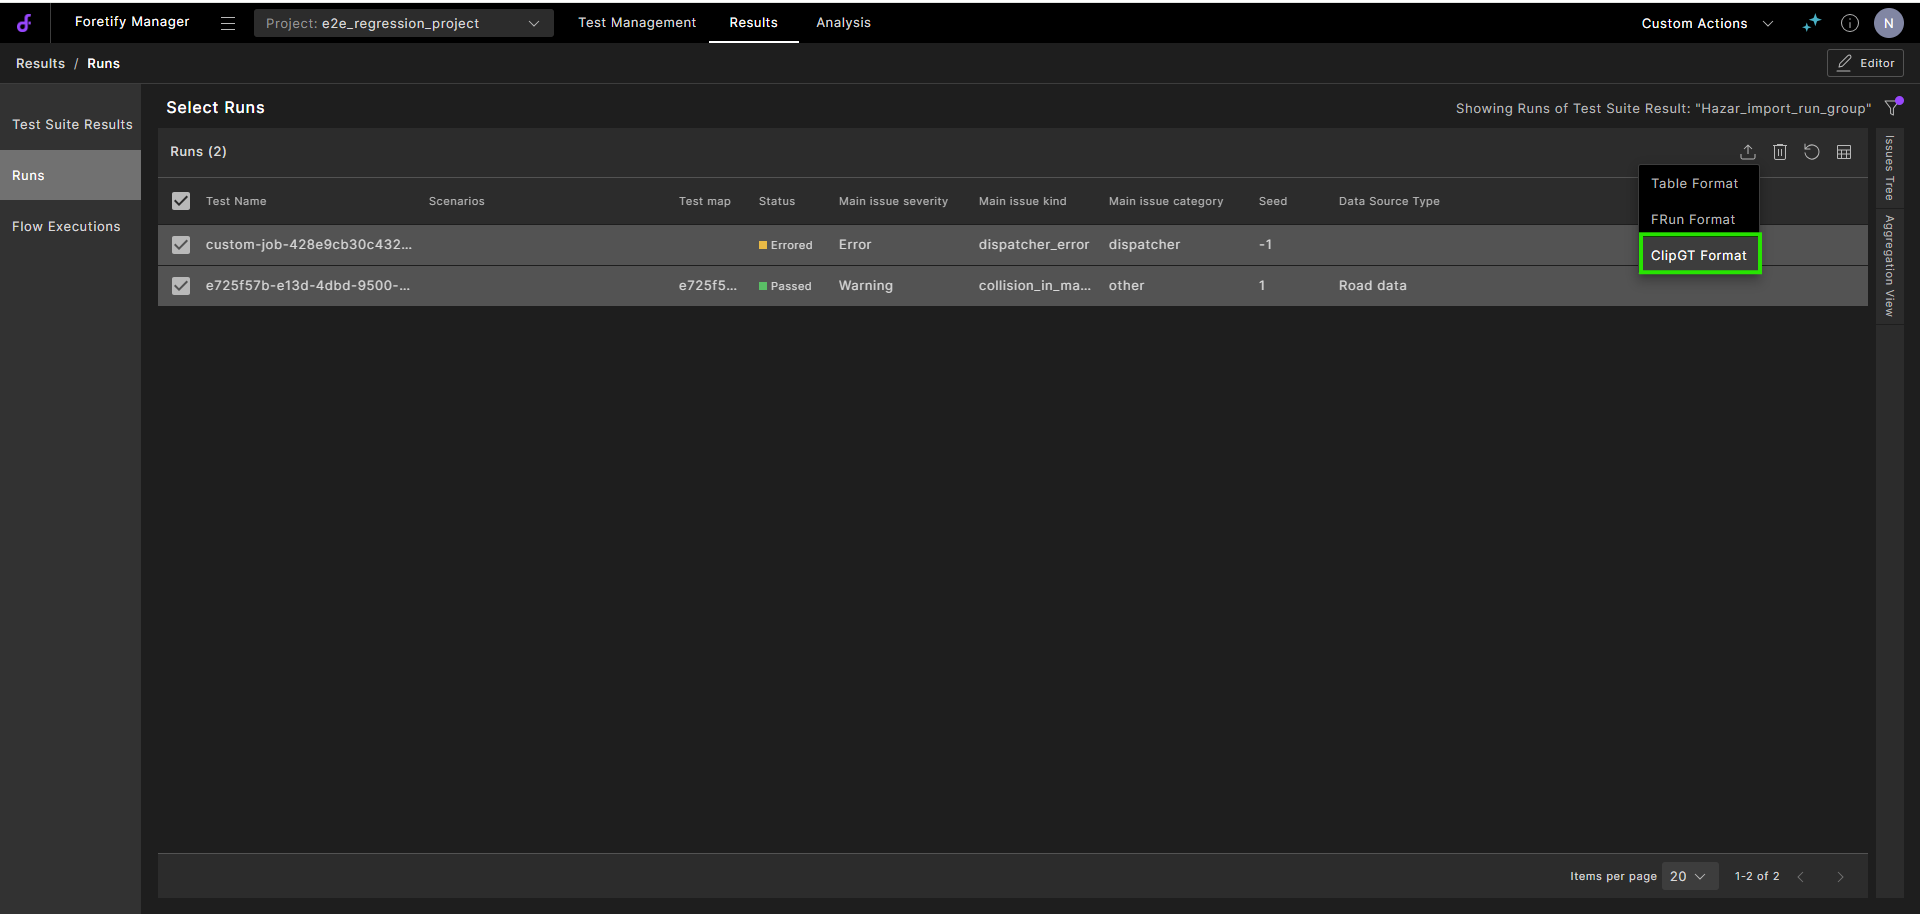
Outside a workspace, select the Results tab and then Runs, and select the checkboxes of runs to export.
-
In a workspace, select the Triage, Workspace Test Suite Results or Runs tabs, and in the runs tables, select the checkbox next to each run you want to export.
In the toolbar, click the Export selected to
icon and select Export Run to ClipGT from the dropdown.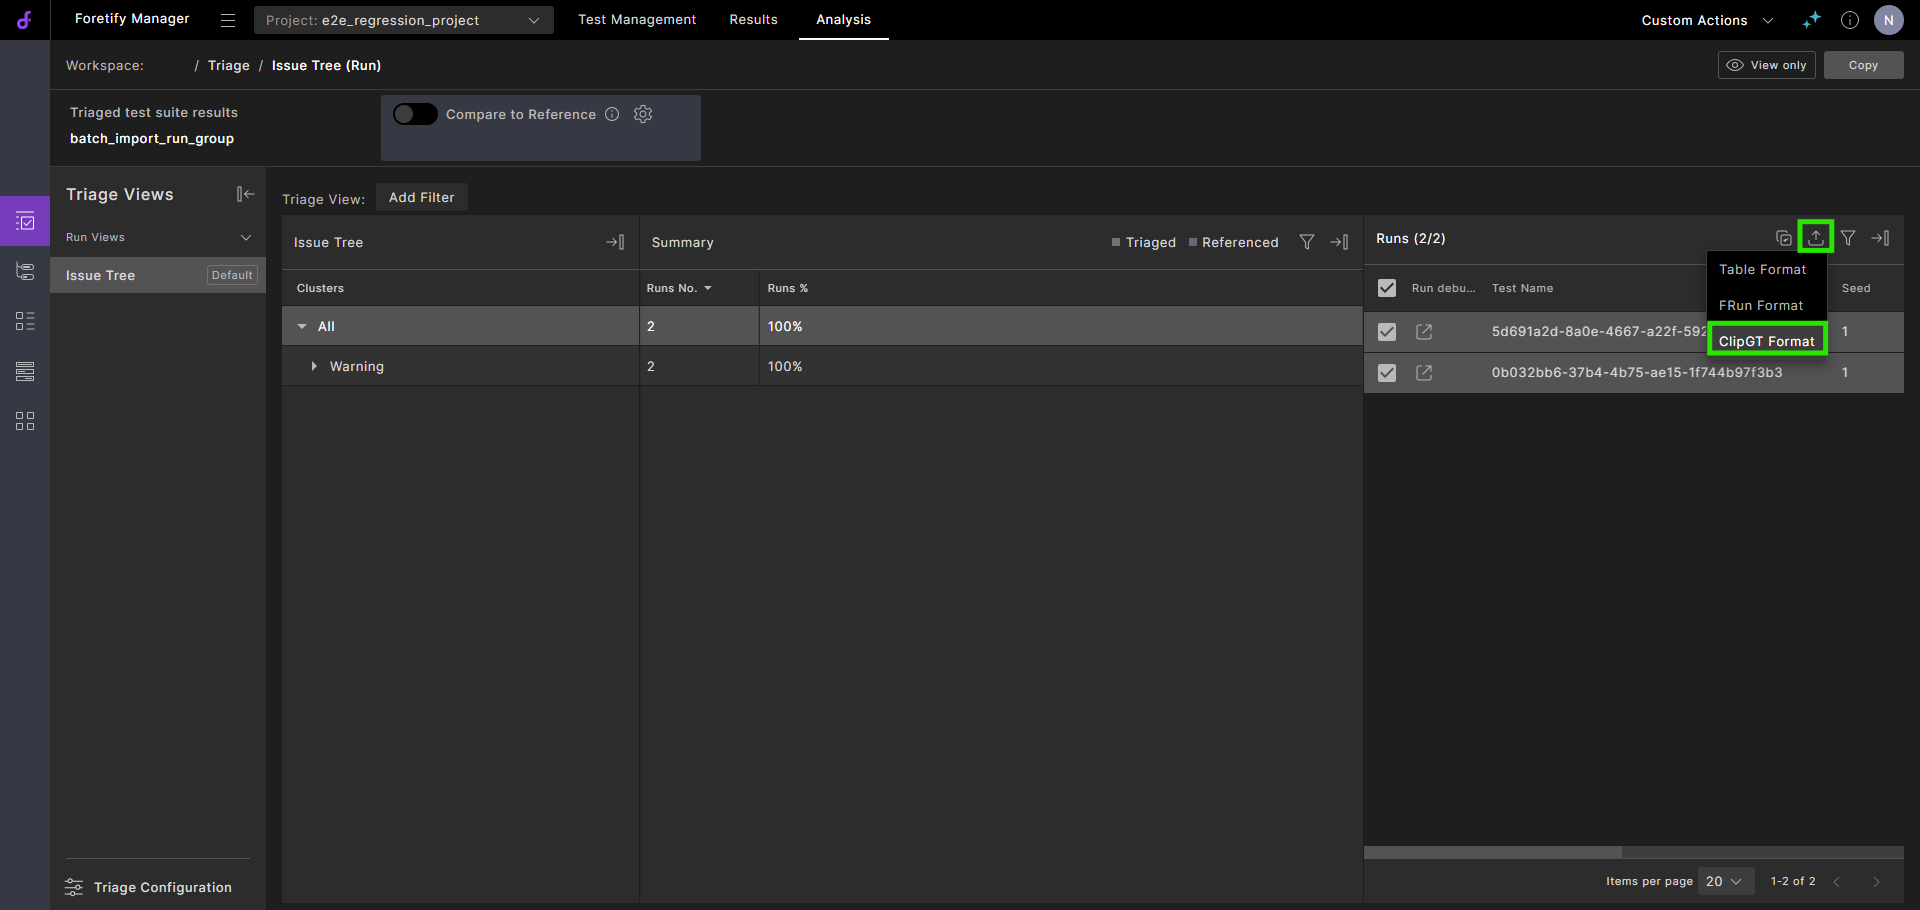
-
In the Debug Run, click the More options
 icon and select Export Run to ClipGT.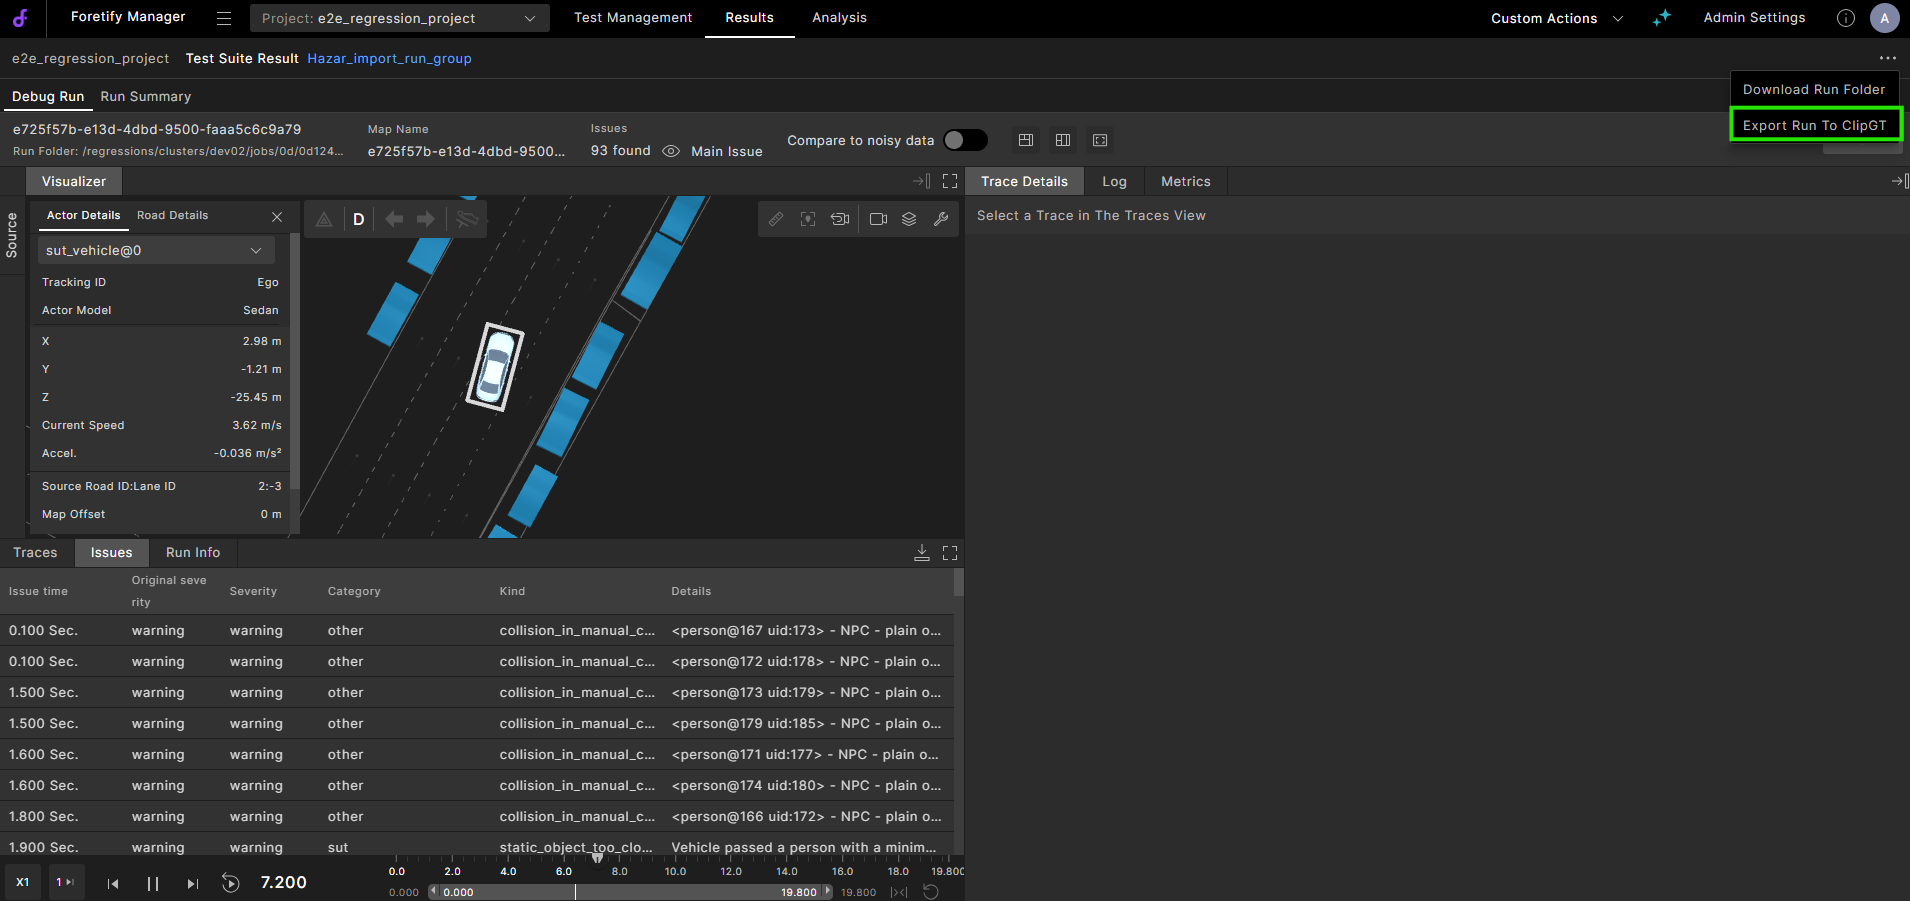
-
-
The Export ClipGT dialog opens, showing the number of selected runs and how many are eligible for export, and prompting to export to cloud storage or to a local computer.
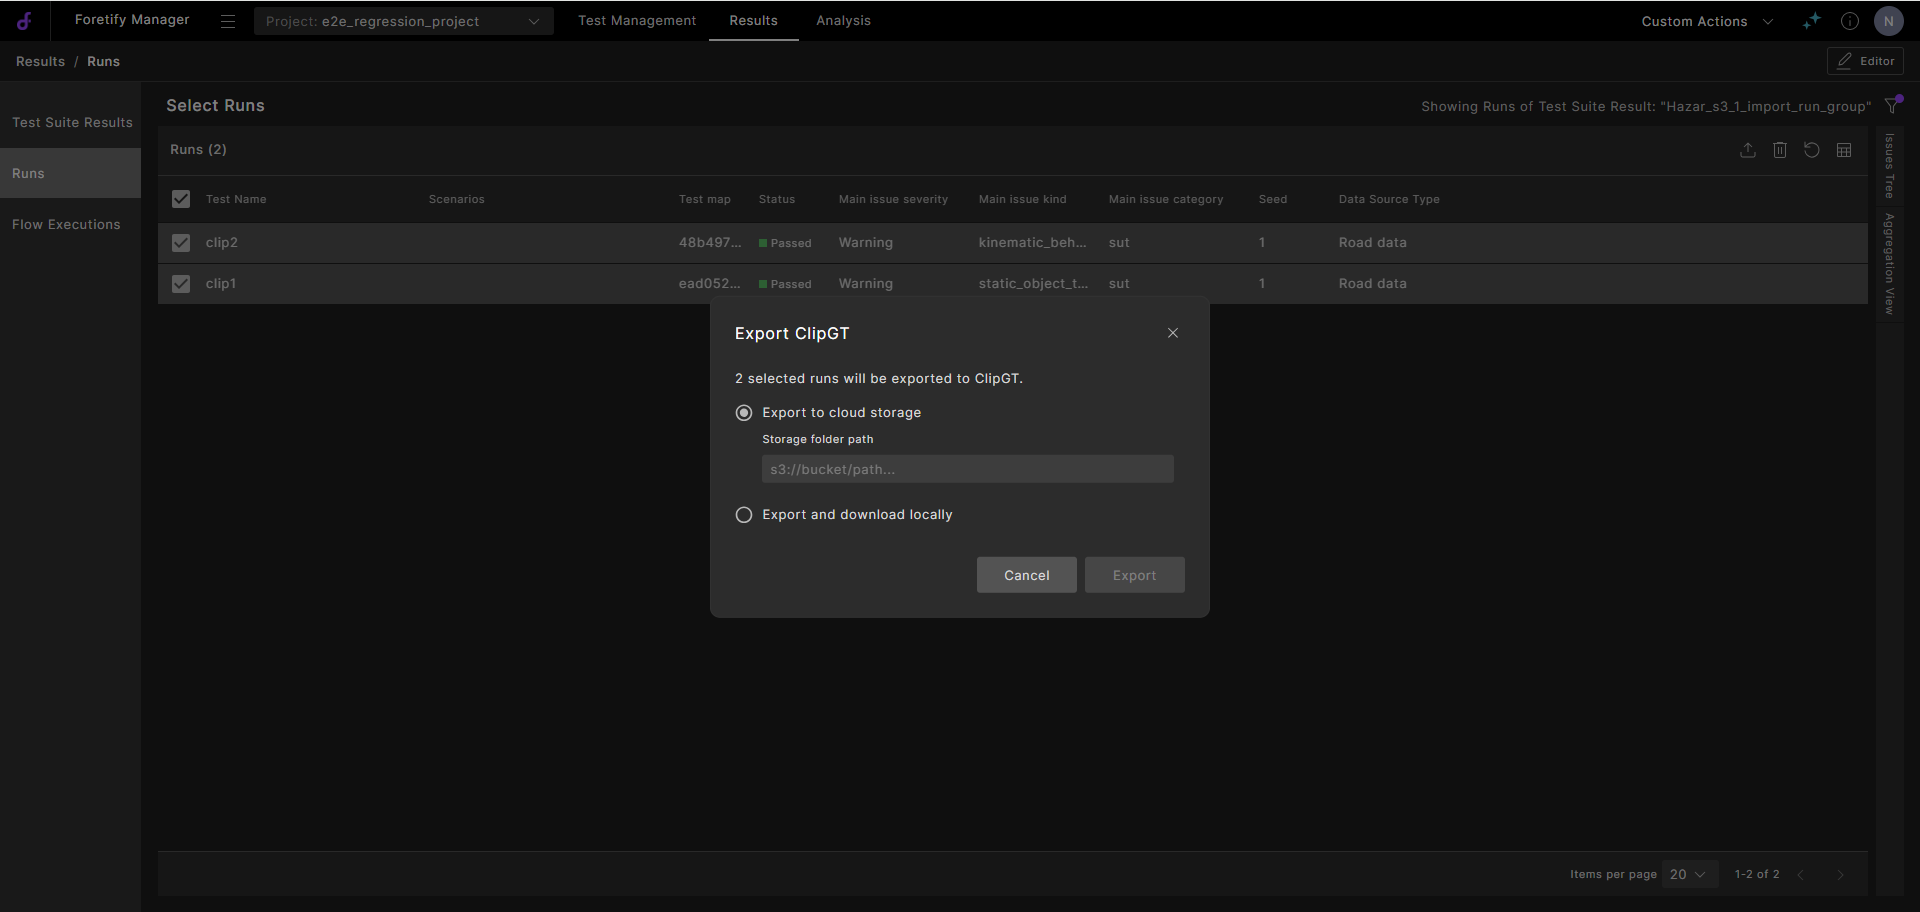
- Select to Export to cloud storage, and enter an S3 bucket location.
- Select to Export and download locally.
-
Click Export to start.
The export process begins, and the status displays.
-
When the export is complete, you have two options:
22.2.1 Go to Flow Executions
-
Click the Go to Flow Executions
icon to open the Flow Execution page. -
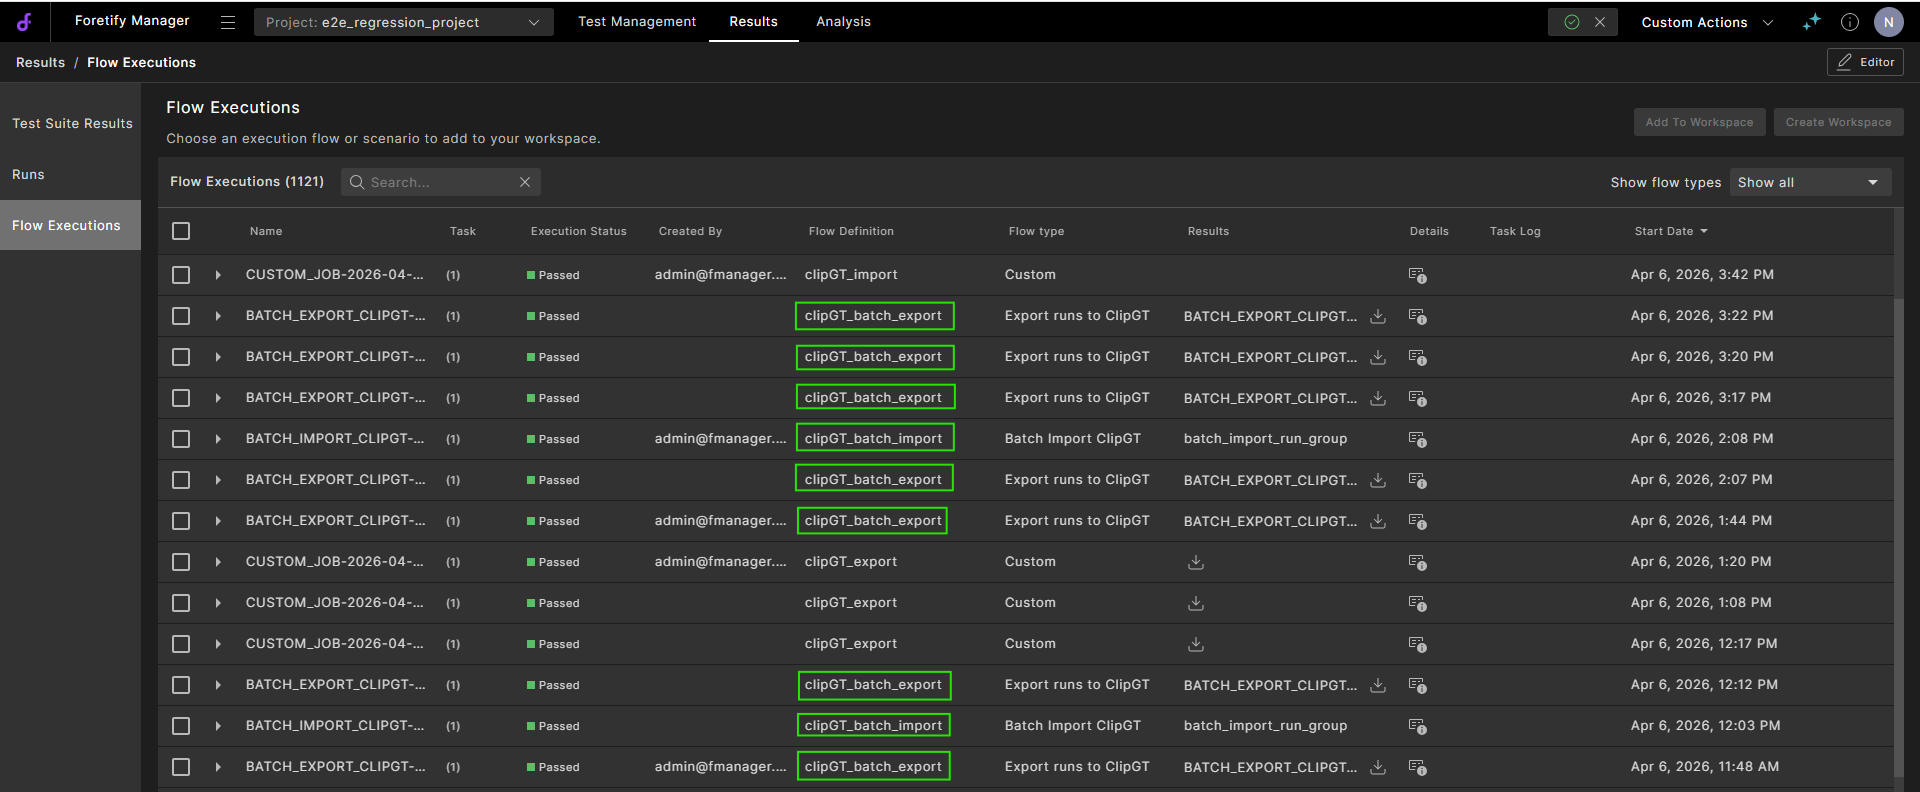
In Results/Flow Executions, you can view details of exported ClipGT files, download the files, and view or download log files.
Batch ClipGT export files have clipGT_batch_export in the Flow Definition column.
-
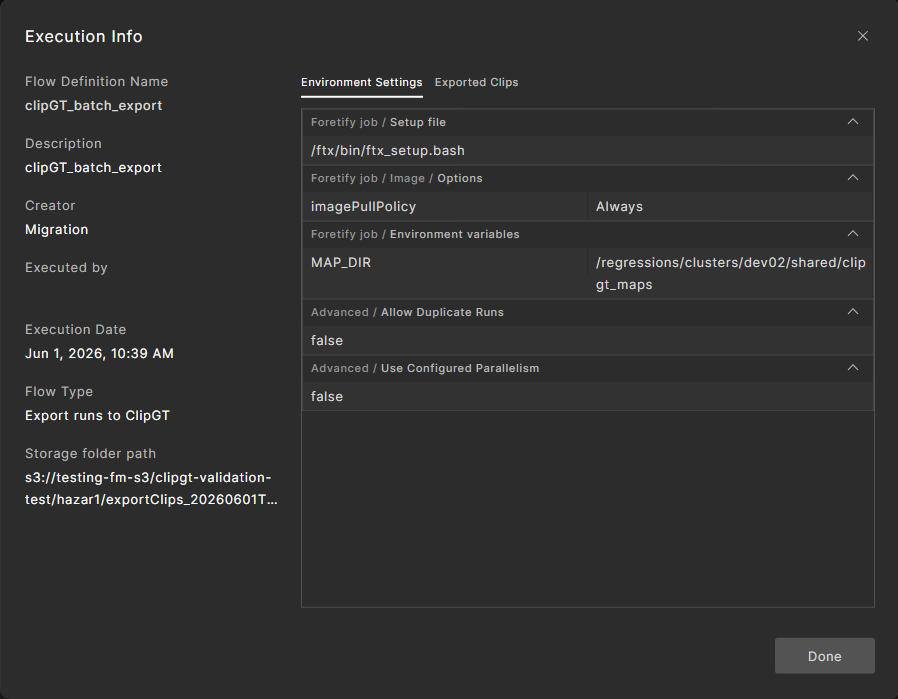
Click the Details
icon to view the flow execution details.-
For exports to cloud storage, the storage folder path is displayed:
-
For exports to a local folder:
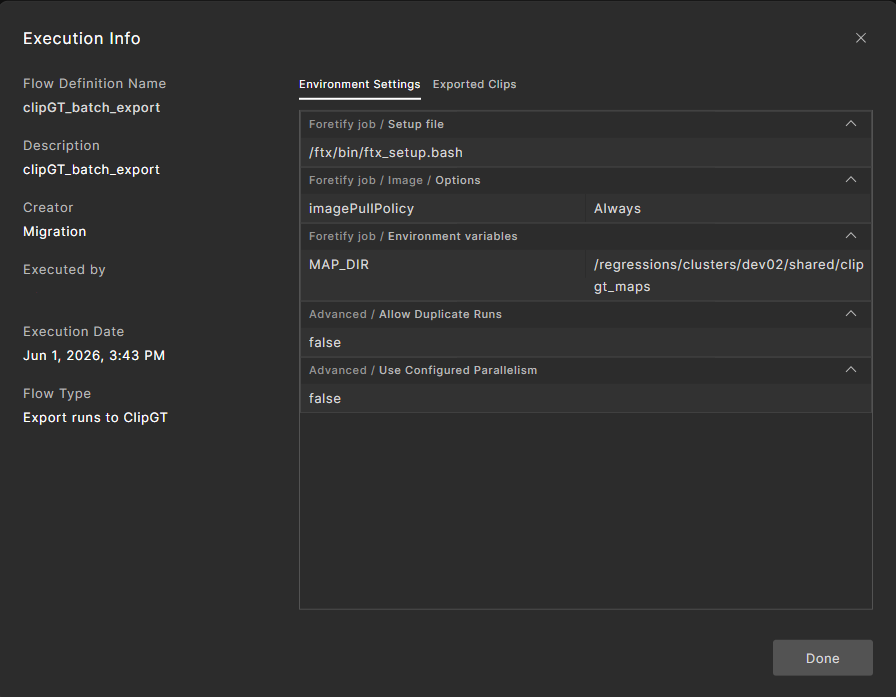
-
-
Select the Exported Clips tab to view the status of the clips.
-
For exports to cloud storage, the storage folder path is displayed:
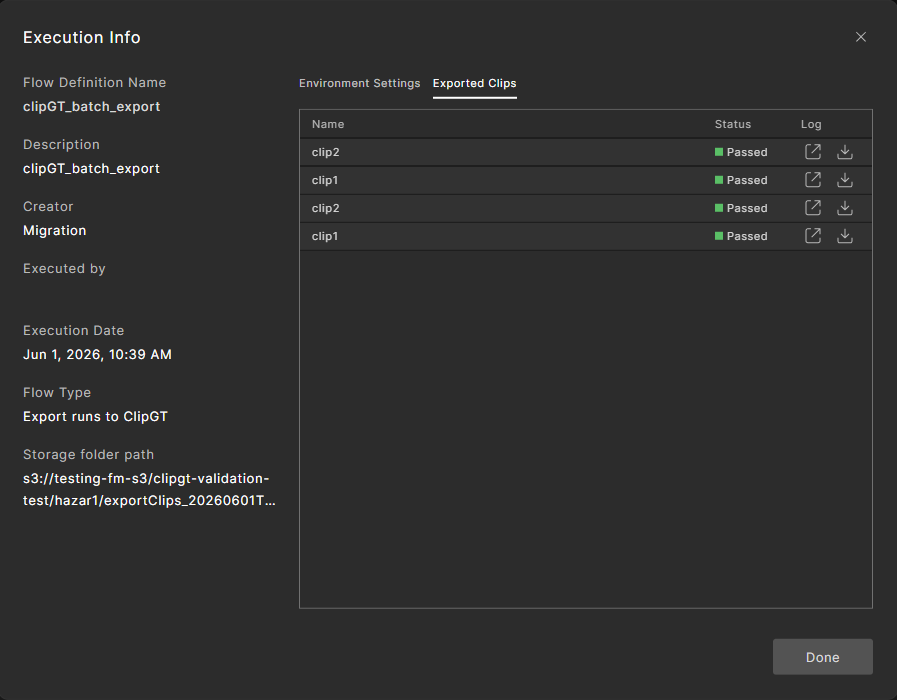
-
For exports to a local folder:
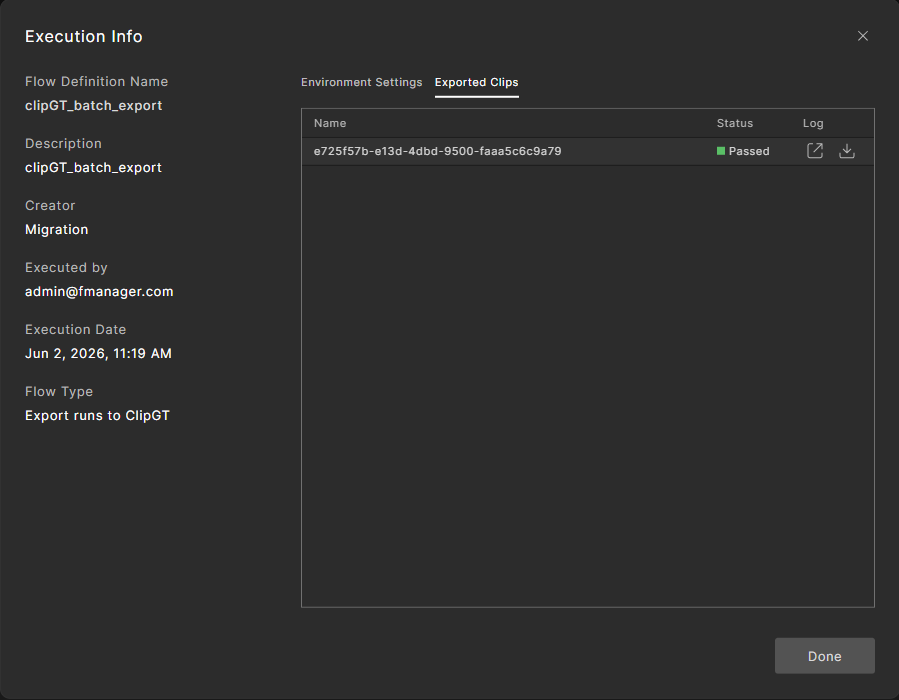
-
-
Click the Open task log
icon or the Download task log icon next to each clip to open or download the log. -
Click Done to close the dialog.
-
-
Expand the flow execution entry.
In the Task log column:
- Click the Open task log icon to view the log file.
- Click the Download task log icon to download the log file to your local machine.
- Click the Open task log
22.2.2 Download Exported ClipGT
Click the Download Exported ClipGT icon to save the ZIP file to your local machine.
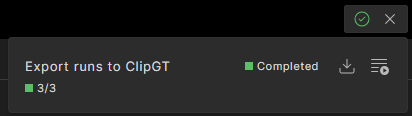
The ZIP file, named clipgt-batch-export.zip, contains one ClipGT file per exported run.